Reminder:
If you are outside of the office, you must first connect to the VPN. Instructions for connecting to the VPN on a Mac can be found at Use the Penn State VPN - Mac.
Connecting to the Server:
- Open Applications from Finder > Go > Applications (or hold Command + Shift + A).
- Find the icon labeled "Windows App" and double-click on it.
Image

- If you already have a connection for s6-austin.ad.psu.edu or Austin, skip to Step 7.
- Within Windows App, click on the "+" button at the top and select "Add PC" from the drop-down.
Image

- In "PC name" type s6-austin.ad.psu.edu. In "Friendly name" type Austin.
Image

- Click the "Display" tab. Change Color quality to "Medium (16 bit)". You may also want to uncheck the boxes next to "Use all monitors" and "Start session in full screen". Click the "Add" button at the bottom to save.
Image

- Double-click on s6-austin.ad.psu.edu or Austin.
Image

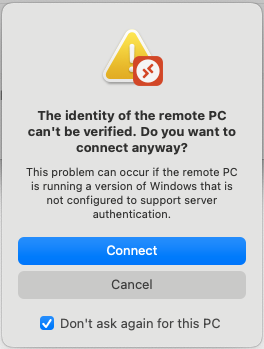
- If you see a message about the identity of the remote PC, check the box next to "Don't ask again for this PC" and click "Connect".
Image
- Login by typing your username in the form of "PSU\abc123" and your PSU Access Account password. Then hit enter or click on "Continue".
Image

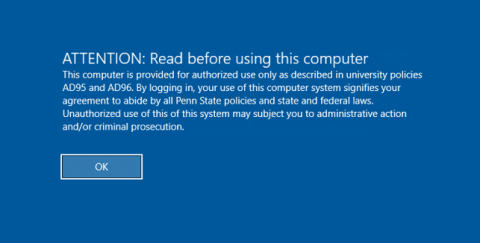
- You will now see a user agreement. Read the agreement. Click OK to accept and continue to the login screen.
Image
- IMPORTANT: When you are finished on the Server, log off. Do NOT select "Disconnect" or just click the X in the top corner of the screen. Unless you log off, your session will remain active.
Logging off:
- Click on the Windows icon to open the Start menu.
Image

- Click on the icon on the left side that looks like a person.
- Select "Sign out".
Image
