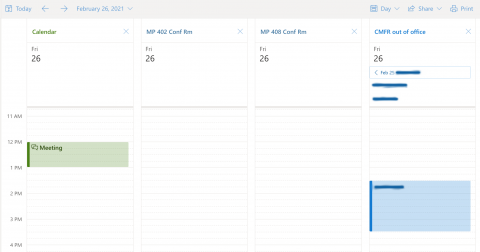
Note: This article applies only to the Clearinghouse conference room calendars.
Accept the calendars:
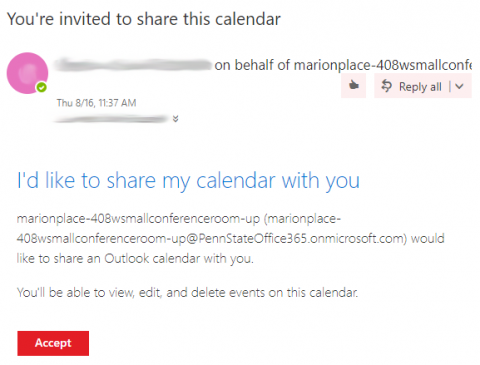
- You will receive an email when you are added to a shared calendar. Note: The email must be opened in Outlook to accept the share.
- Click on the "Accept" button to add the calendar to your list of calendars.
- The email will be automatically deleted once you successfully accept the share.
Image
Customize a calendar:
- Go to the Calendar tab of Outlook.
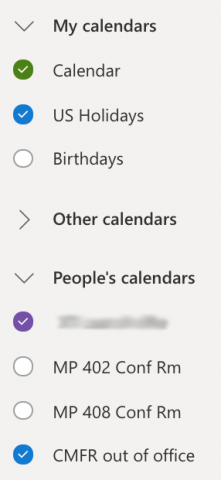
- To customize a calendar, right-click on its name.
- You may:
- Rename it to something easier to distinguish.
- Change the color.
- Apply a charm.
- You may:
- Note: These changes will only affect your instance of the calendar.
Image
Create a meeting:
- You can create a meeting by clicking on "New event" at the top of the Calendar tab or by clicking on an empty time slot.
- If you click on an empty time slot, you will see less options. From the reduced options, you can click on "More options" to go to the advanced appointment options.
Image
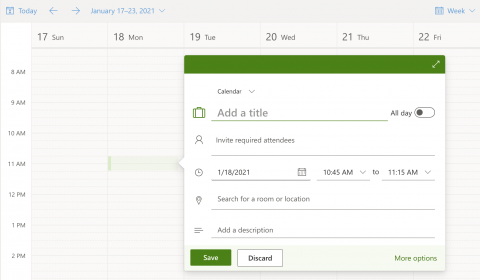
- Be sure to choose the correct calendar from the down arrow by "Calendar". If you leave it as "Calendar", the meeting will only be created on your personal Outlook calendar.
- Do not use the "Search for a room or location" field. In order to be booked correctly they must be booked with the Calendar selection. If you would like, you can type the location of the meeting in the description section.
Image
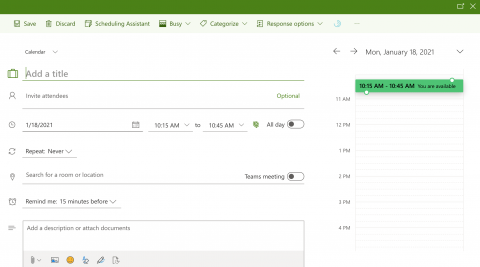
- Select the time/date for your meeting:
- Be sure to check that the conference room does not have another appointment in the calendar preview on the right sidebar.
- Then under "Invite attendees" enter the email addresses of people to invite to the meeting in the search box.
- Be sure to include yourself. This will automatically place a tentative meeting on your personal calendar, as well as the conference room calendar.
- All Attendees will receive email invitations to the meeting.
Tips:
- If you have several calendars, the display can get messy. Click on a calendar's name or checkmark to select it/deselect it from your view.
Image
- If you are trying to find an available room for a meeting, try the "Split" view.
- If necessary, view your calendar and select "Day" from the options near the top right corner.
- Click on the view options again, and select "Split view" at the bottom.
Image
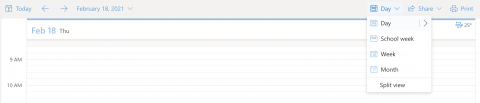
- Your selected calendars will be shown side by side instead of all together.
Image