This guide only applies to Windows computers which are on the Enterprise Active Directory (EAD) domain and are connected to ethernet.
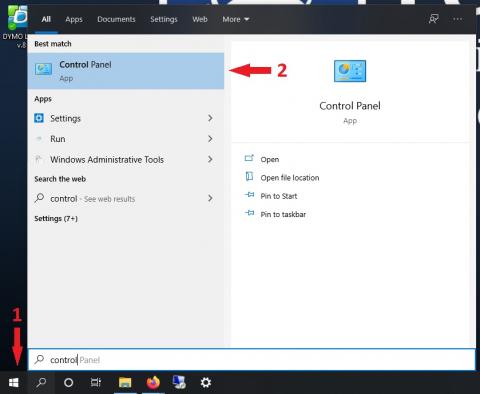
- Click on the Start Menu or Search icon in the bottom left corner of the screen.
- Type "Control Panel" without the quotes, then select the Control Panel app.
Image
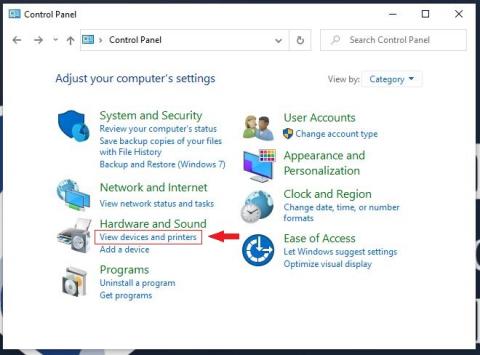
- Under the "Hardware and Sound" section, click on "View devices and printers".
Image
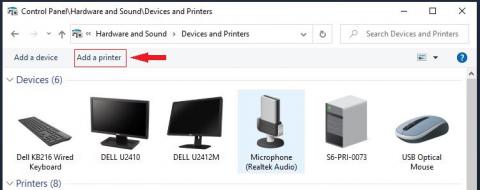
- Click on “Add a printer” at the top of the screen. A new window will open.
Image
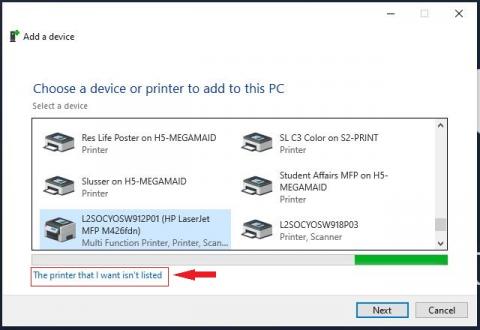
- At the bottom of the window, select the option for “The printer that I want isn’t listed”.
Image
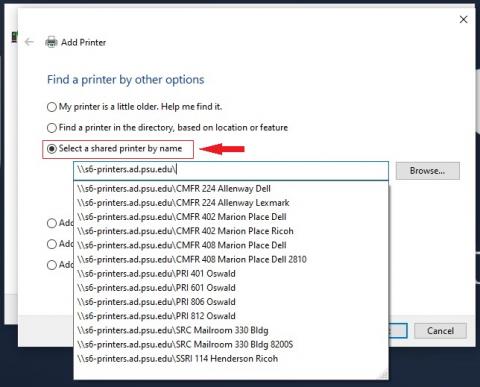
- Click on the radio button next to "Select a shared printer by name". In the box, type "\\s6-printers.ad.psu.edu\" (without the quotes).
- As soon as you enter the last backslash ( \ ), a list of all SSRI printers will appear. Select the printer you want from the list.
Image
- Click the “Next” button. Your computer will communicate with the printer and automatically install any required drivers. This step may take several minutes.
- You'll be shown a confirmation window once the printer has been successfully added. Click on the "Next" button.
- Click on the "Print a test page" button, then click on the "Finish" button.
- Verify that your test page actually printed from the printer you installed.